Double pearl necklace | DIY
I’ve been seen this necklace for the past year and I looked for it everywhere, even
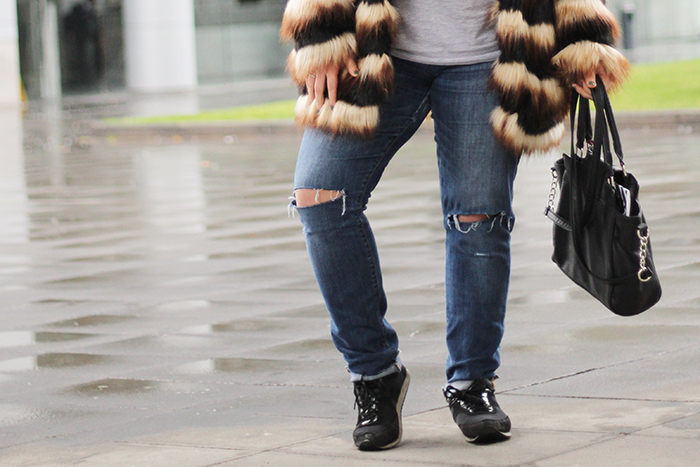 These past seasons denim has made a huge comeback, and after a while of course it needs to reinvent itself. So, lately I’ve been watching a lot -and I mean A LOT- of ripped jeans around, but with a specific characteristic: ripped knee. You can find ripped knee jeans everywhere since a long time, but you can also do DIY ripped knee jeans for a cheaper price, you just need a few minutes and some basic things I’m sure you already have.
![]() Estas últimas temporadas el denim volvió para quedarse, y con el paso del tiempo claro que tiene que reinventarse. Así que últimamente he estado viendo mucho -y en verdad, MUCHO- los pantalones rasgados, pero con una característica específica: rasgado en la rodilla. Ahora ya puedes encontrar ese estilo en todas partes, pero también es súper fácil hacerlo uno mismo, en sólo unos minutos y con algunas cosas básicas que estoy seguro que ya tienes en casa.
Estas últimas temporadas el denim volvió para quedarse, y con el paso del tiempo claro que tiene que reinventarse. Así que últimamente he estado viendo mucho -y en verdad, MUCHO- los pantalones rasgados, pero con una característica específica: rasgado en la rodilla. Ahora ya puedes encontrar ese estilo en todas partes, pero también es súper fácil hacerlo uno mismo, en sólo unos minutos y con algunas cosas básicas que estoy seguro que ya tienes en casa.
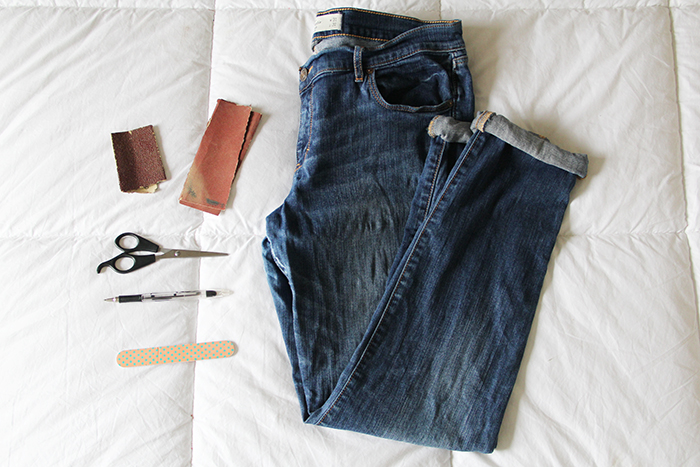
You’ll need: Scissors, a pen, sand paper (or a nail file) and a pair of old jeans. I did it on my only pair to force myself to buy new ones. // Necesitas: tijeras, una pluma, papel lija (o una lima de uñas) y unos pantalones viejos. Yo use los únicos que tenía para obligarme a comprar otros nuevos.
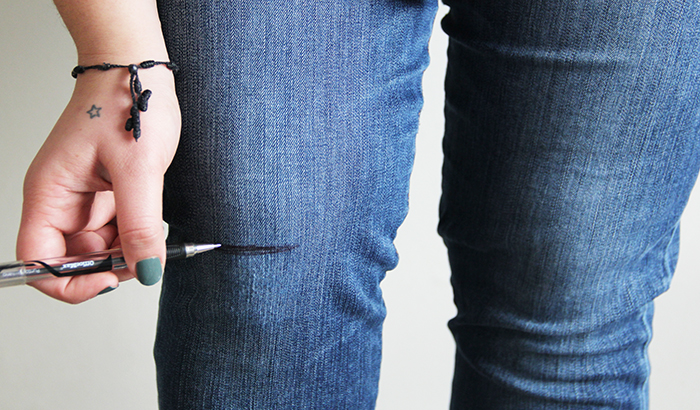 [ezcol_1half]1. You want to start by wearing your jeans and making a mark with the pen where you want your holes to be. If you are a shorty like me, you can make the hole a little above the actual knee and that will help your legs look longer.[/ezcol_1half][ezcol_1half_end]1. Primero tienes que ponerte los jeans y marcar con una pluma donde quieres que estén los cortes. Si eres bajita como yo, puedes hacer lo rasgado un poco más arriba de tu rodilla, eso va a ayudar a que tus piernas se vean más largas.[/ezcol_1half_end]
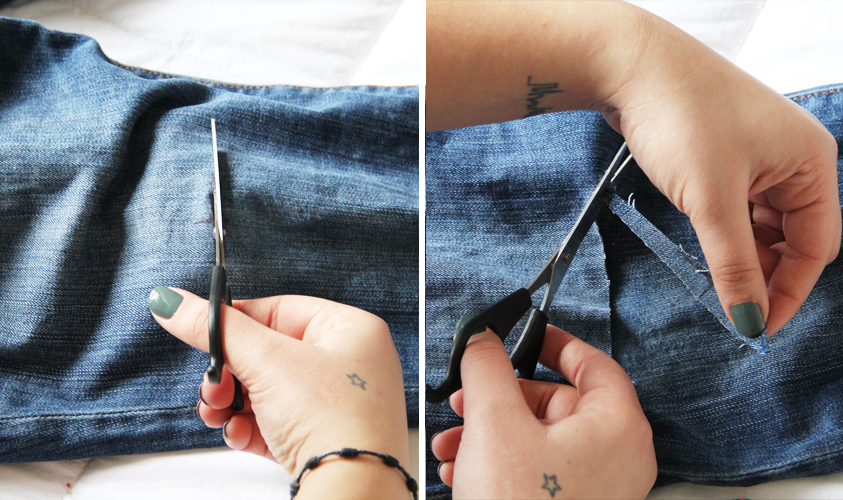
[ezcol_1half]2. Then comes the fun part, you have to cut a long the mark you just made. Try to keep an inch from the whole to the border and don’t worry if it’s not perfect, you can even cut a piece of the jean if you are doing the holes in a boyfriend/wide jeans like I am to make it more noticeable.[/ezcol_1half][ezcol_1half_end]2. Ahora viene la parte divertida, tienes que cortar la marca que acabas de hacer. Trata de dejar una pulgada en cada lado y no te preocupes si el corte no es perfecto. Puedes cortar un trozo de la mezclilla si es que estás haciendo los agujeros en unos pantalones anchos como yo para que se note más.[/ezcol_1half_end]
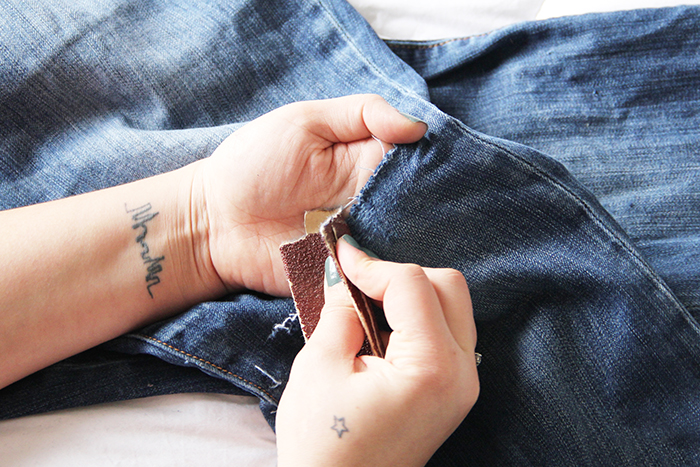
[ezcol_1half]3. Now destroy the edges with your sand paper or nail file, scrub until you get the look you want, but let me tell you it will get looser and messier as you wash them.[/ezcol_1half][ezcol_1half_end]3. Por último hay que destruir los bordes con alguna lija, raspa la tela hasta obtener la apariencia deseada, pero déjame advertirte que se soltarán y destrozarán más a medida que los uses y laves.[/ezcol_1half_end]
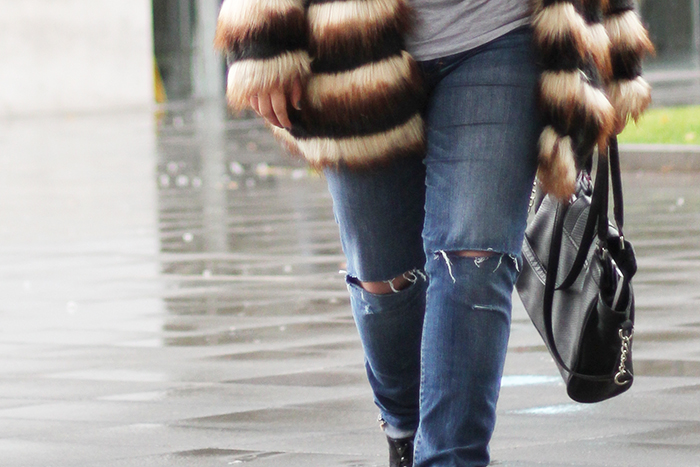
And there you have it! A really cheap, fashionable and super easy DIY.![]() ¡Y ahí lo tienes! Un DIY realmente barato, de moda y muy fácil.
¡Y ahí lo tienes! Un DIY realmente barato, de moda y muy fácil.
If you make them don't forget to show me your result via Facebook, Twitter or Instagram!
//
Si se animan a rasgar sus jeans no se olviden de compartirme cómo
les quedo en Facebook, Twitter o Instagram!
xo,
Luisa Verdee.

I’ve been seen this necklace for the past year and I looked for it everywhere, even

DIY your trends Between the current trend of minimalism, simple wardrobes, and past blogger problems, I found myself

I’m not going to lie, it’s really difficult for me to wear such simple outfits, but
One Response
Nice bag 🙂
BLOG M&M FASHION BITES : http://mmfashionbites.blogspot.gr/
Maria V.